As you progress in your figure skating, you will want to understand better the figure skate blades to choose the best ones for you. There are various styles with different profiles, toe rakes, tails, metals... I have tried gathering all the info you may need to choose and maintain your blades.
This article contains affiliate links. If you purchase using my link, I get a commission at no extra cost to you (learn more).
Anatomy of the figure skate blade
Before we look in details at the various profiles your blade can have, it is best you understand the different parts of that blade.
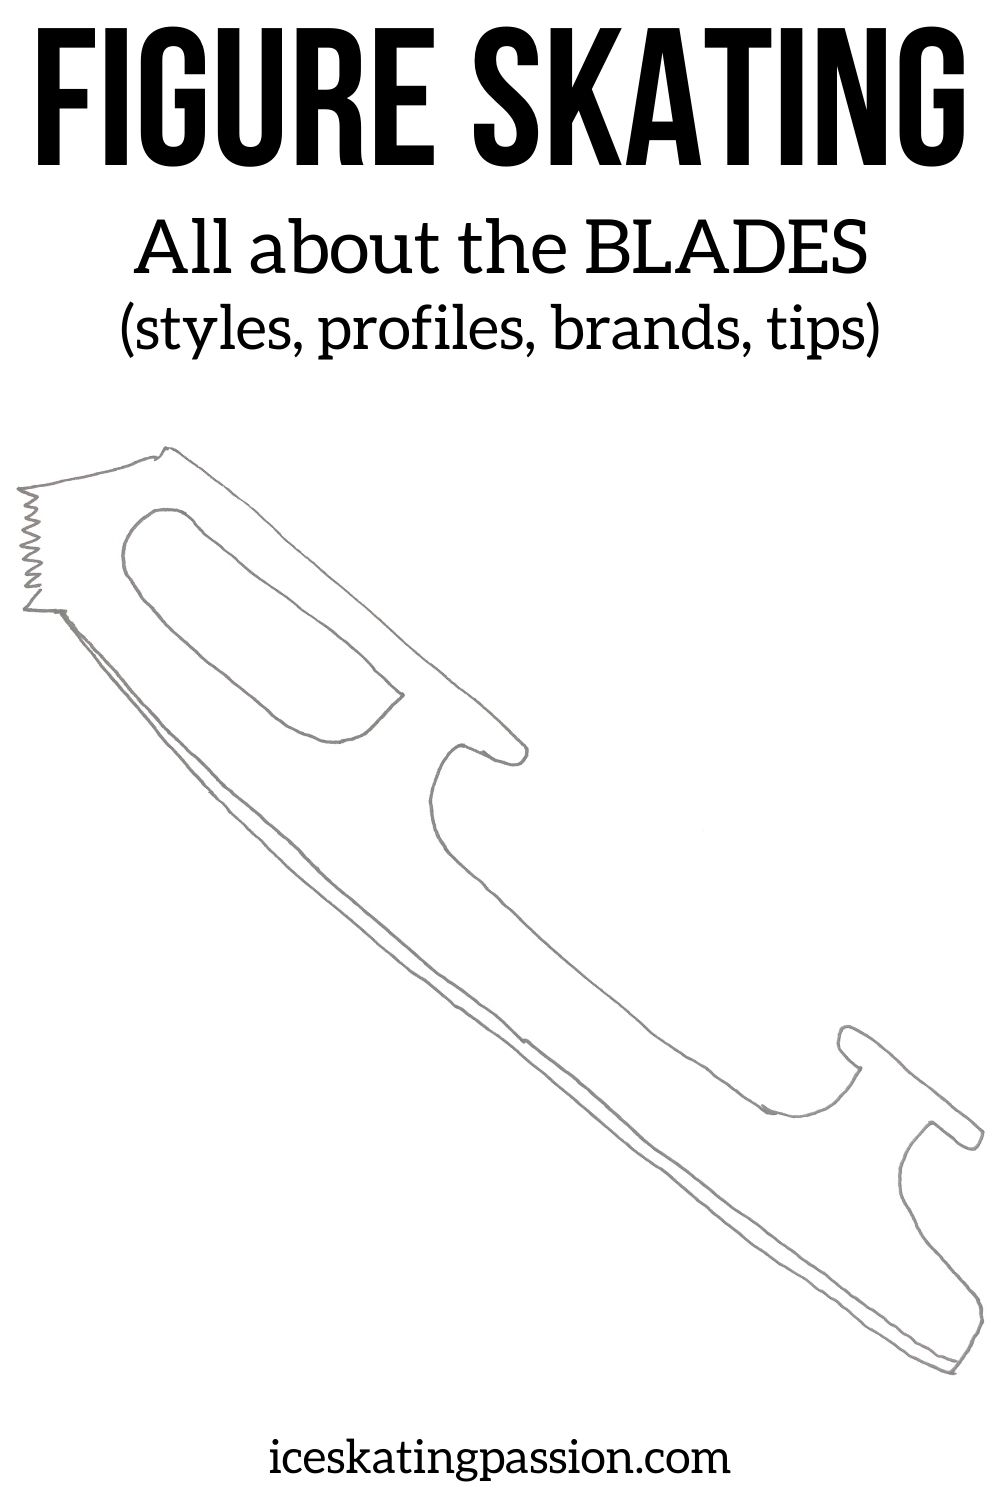
Below is a simplified drawing with the main elements:
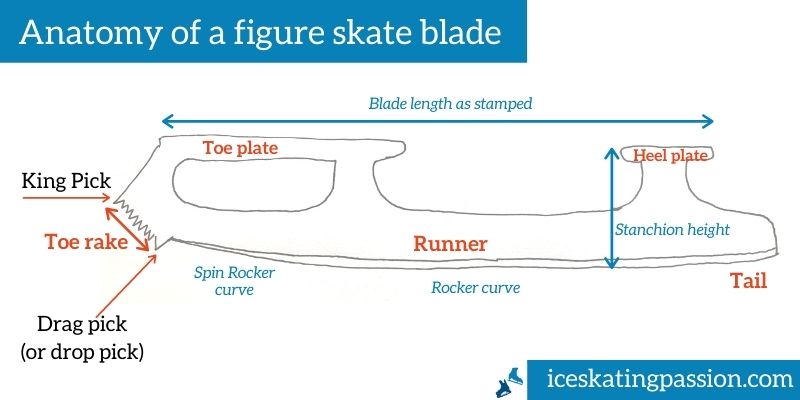
- The runner is the area of the blade the is in contact with the ice when gliding
- The non-skateable zone is between the runner and the toe rake. It is used when spinning
- The toe rake is the front of the blade, also known as the teeth
- The drag pick (a.k.a. Master or Drop pick) is the bottom pick
- The king (a.k.a Primary pick) is the top pick
- The stanchions are the columns between the runner and the plates
- The toe plate is the larger metal plate that attaches one stanchion to the toe area of the sole.
- The heel plate is the smaller metal plate that attaches the other stanchion to the heel area of the sole.
Criteria to choose your blades - overview
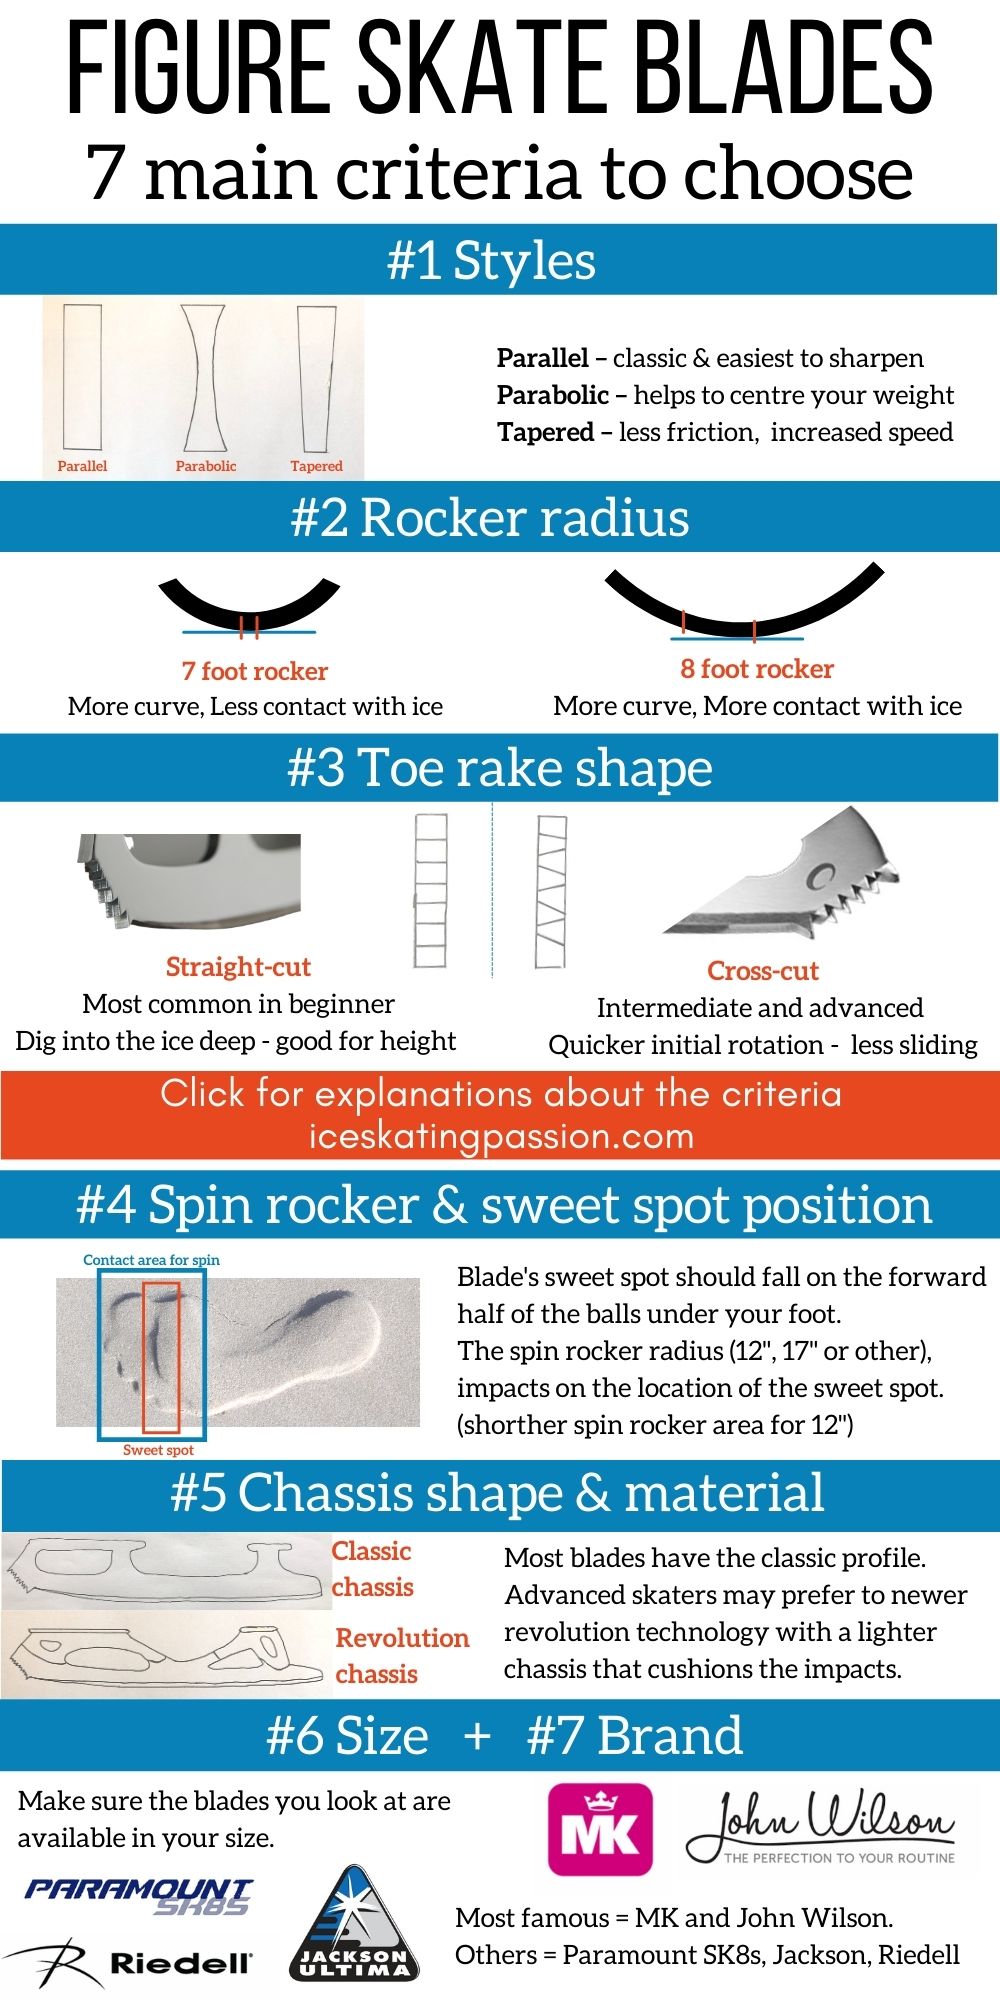
Below are the main criteria to compare when choosing your blades.
This is a quick overview. Explanations are provided on each one, and more, later in the article to better understand why.
#1 Style
- Parallel – most blades run parallel; easiest to sharpen
- Parabolic – similar to parallel, but the blade is thinner at the center, which helps to center your weight on this part of the blade
- Tapered – the blade is thinner at the tail end of the blade, this results in less drag and friction, offering increased speed
#2 Rocker radius
- 7-foot rocker - The blade is more curved (meaning less contact surface with the ice) - Smoother when spinning (during spins, twizzles or turns) but less control on your edge work and when landing jumps.
- 8-foot rocker - a little bit flatter (more contact surface with the ice) - Better for speed and edge control, more stability when landing jumps, but harder to find the sweet spot for spinning
#3 Toe rake style
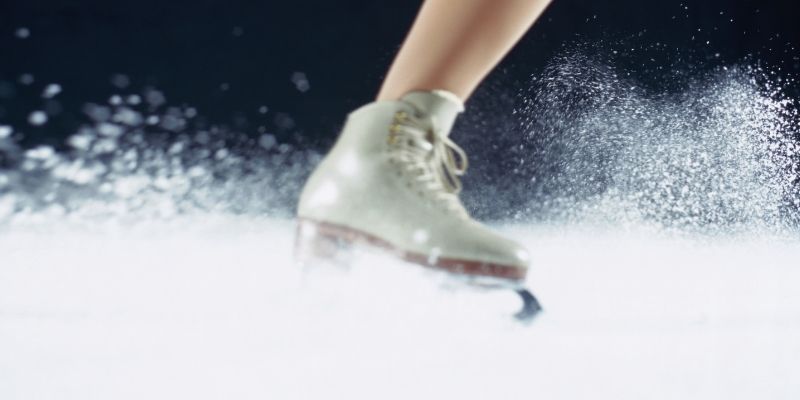
- Straight-cut toe rake - Most common for beginners - They dig into the ice quickly and deep for firm grip - good for height on jumps but provide less momentum
- Cross-cut toe rake - Best for intermediate and advanced to avoid sliding and secure the jumps - quicker initial rotation with less sliding - but less help for height
- Size - You can also choose blades with larger spikes or not. Beginners prefer smaller ones to avoid tripping, while advanced skaters (but not dancers) may prefer larger spikes for more contact with the ice
#4 Spin rocker / Sweet spot position
- To make the best spin (with as little friction as possible), you want the sweet spot of the blade to fall on the forward half of the balls under your foot (see drawing further down).
- The spin rocker is the section in front of the sweet spot, the part of the blade you spin on.
- The radius of this section is stated in inches - such as 12" or 17" (Sometimes there is another inflection point with 2 radiuses)
- The curvature's biggest impact is on the location of the sweet spot. Do you need it closer to the front (small toes) or longer?
#5 Chassis shape and material - for very advanced skaters
#6 Available sizes (length)
#7 Brand recognition
Details about all those criteria and more in the following sections.
The different blade styles
The Blade styles - shape over the width
When looking at the blade profiles over their width, you may notice 4 different shapes.
Most blades run parallel, but the other adjustments create certain advantages for skaters in competitions.
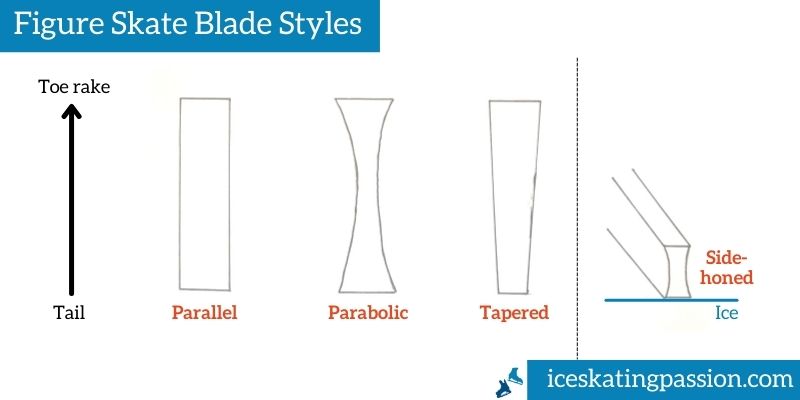
- Parallel
Both edges run parallel
Pros - Easy to sharpen - Parabolic
Symmetrical design, but thinner in the middle
Pros - helps to center the weight, reduces slippage on the ice (by increasing bite angle). - Tapered
The blade is thinner at the tail end
Pros - less friction, increased speed - Side honed
Edges run parallel but on the vertical side, some material has been removed. It means that the blade is lighter and has deeper edges
Pros - channel water and ice away from the blade
Width of the blade
Dance and synchro blades can be narrower than standard blades.
This enables faster shift between edges. Considering the complex footwork required in this discipline, this is an advantage.
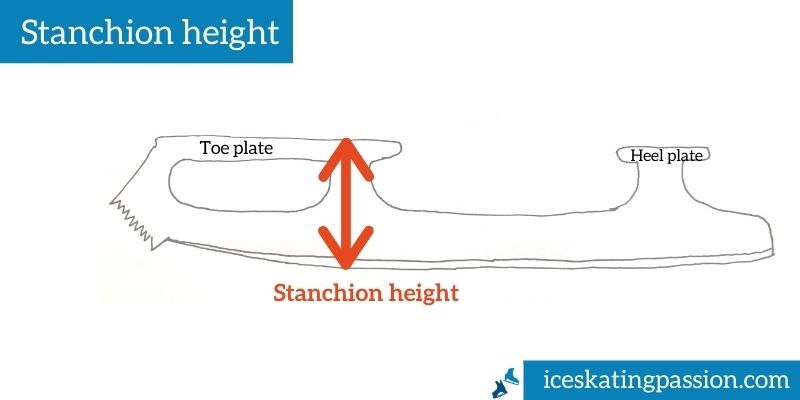
The stanchion height
On their blade summary table, the John Wilson website also mentions the stanchion height with attributes such as high, low or standard.
However, not many blade manufacturers mention the height of the stanchion
It is the height from the ice to the sole of the boot (top of the mounting plate).
Low stanchion height means closer to the ground (ice) and more balance. So often better for less advanced skaters.
Higher stanchion height means more clearance. It is often enjoyed by male skaters. Their wide boots could otherwise scrape the ice.
Chassis profile - classic vs revolution
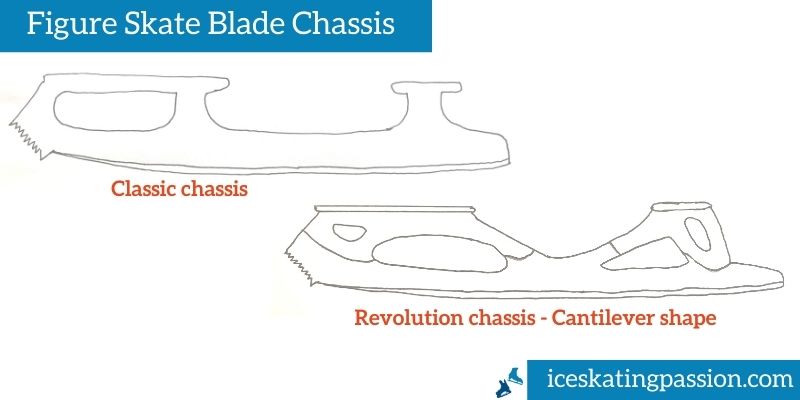
Most blades have the classic profile you can see on the drawing above.
However, in recent years, a new technology and shape has been introduced by MK and John Wilson: the Revolution.
Originally, they were designed to be lighter with composite chassis.
However, as skaters started using them, they found that the new cantilever shape and composite material combination provided more elasticity. It cushions the impact. The blade is often described as smoother and more responsive.
The blade profile: rocker, spin rocker and sweet spot
About the rocker
The rocker is the curved part of the blade that allows it to rock back and forth.
Several elements of that radius have an impact on your skating position:
- The radius of the rocker
- The position of the sweet spot
- The radius of the spin rocker
The Rocker Radius
The radius of that curve is not the same for all blades. The smaller the radius, the more rocking movement is possible.
There are 2 main rocker options: 7 or 8 foot radius.
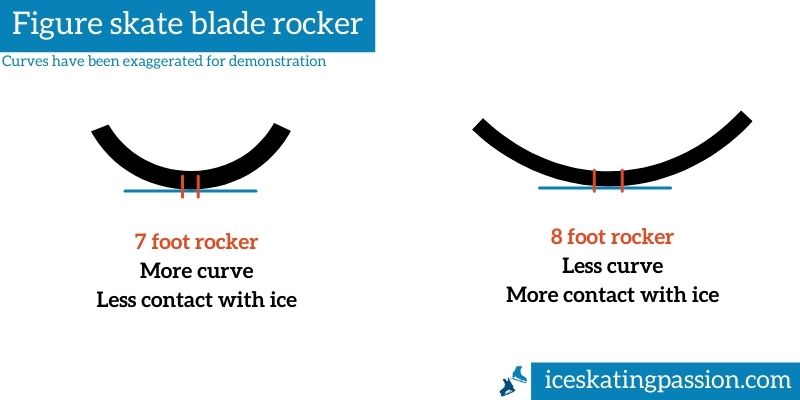
- 7-foot rocker
The blade is more curved = less contact surface with the ice
Pros - smoother when spinning (during spins, twizzles or turns)
Cons - since you have less contact surface, you have less control on your edge work and when landing jumps.
Best when learning to control and center spins. Can be best for less advanced, but would require a transition period if moving to 8-foot when starting bigger jumps. - 8-foot rocker
The blade is a little bit flatter = more contact surface with the ice
Pros - better for speed and edge control, more stability when landing jumps
Cons - the sweet spot is less obvious and harder to find for spins and turns
Best when trying to land bigger jumps, but only when you already master spins.
The sweet spot
The curvature of the blade is not continuous though. Closer to the pick the curvature changes to give clearance to the toe picks.
The point of inflection where the curvature changes is called the sweet spot. It is the ideal part of the blade to spin and turn on.
Before the sweet spot is the spin rocker, after it is the rocker.
When you are placing your body weight and foot pressure on the sweet spot, it feels slick as there is hardly any friction.
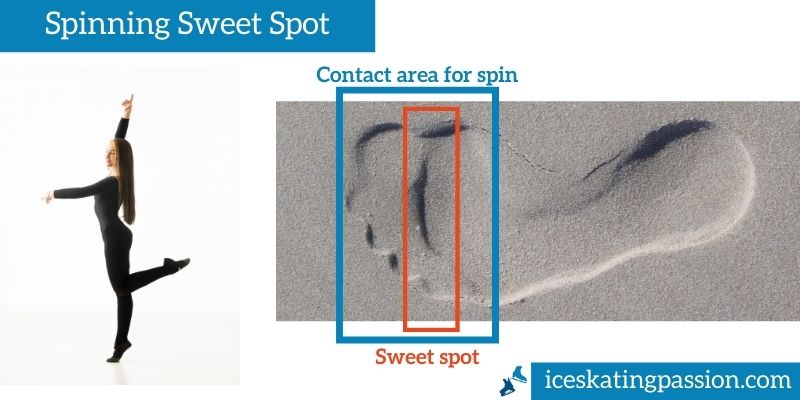
To make the best spin (with as little friction as possible), you want the sweet spot of the blade to fall on the forward half of the balls under your foot. (Try spinning on the floor without skates, to feel the part of your feet making contact with the floor, and where the most pressure is).
Therefore, you need to find the right blade for you - shorter toes would have a sweet spot more forward for example.
The spin rocker radius
The spin rocker is the section in front of the sweet spot, the part of the blade you spin on.
It is located between the sweet spots and the point where the blade cannot rock further because of the drag pick.
The radius of this section is stated in inches - such as 12" or 17". Sometimes there is another inflection point when there are 2 different sections with different radiuses in the spin rocker (for example the Pattern 99 by Wilson). On the John Wilson website they refer to the spin rocker as secondary rocker and the attributes as aggressive, standard or subtle.
The curvature's biggest impact in on the location of the sweet spot whilst avoiding contact of the drag pick with the ice.
The larger the spin rocker radius, the flatter the blade (subtle), the longer the spin rocker section
The smaller the spin rocker radius, the more curved the blade is (aggressive), the shorter the spin rocker section.
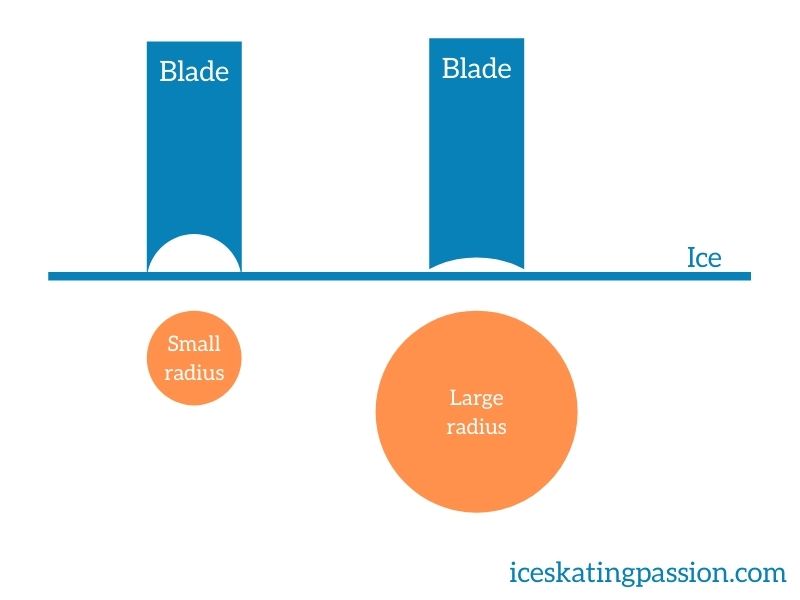
Do not mix up with Radius of Hollow (RoH)
You might also often hear about the radius of hollow of your blade. This is very important for your skating but it is not about the profile of the blade. It has to do with how deep the sharpening of your blade is done.
Blades are sold with a recommended RoH. However, you can sharpen them the way you want.
In the next section we will look at toe rakes.
Toe rakes
The toe rake (also called Toe Pick or Teeth) is the most well-known part of the blade.
Who does not remember the first time the hockey player puts on figure skates in the movie "The cutting edge" also known as the Toe Pick scene? (by the way, see my ice skating movie list)
What are they used for?
- For take-off on toe jumps - the picks grip onto the ice to give a stable takeoff
- For landing on all jumps - they provide a pivot point to control the impact
Beginner skaters often have smaller toe picks to avoid tripping on them, while more advanced figure skates will have bigger toe picks for better jump performance.
What many don't know is that all blades have different profiles of toe rakes.
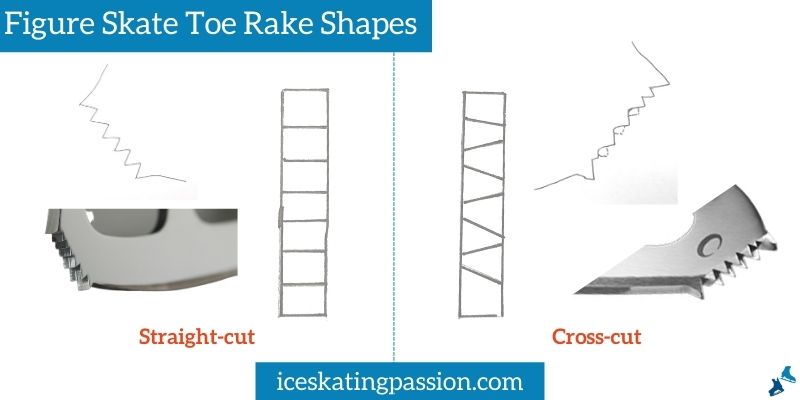
Straight-cut toe rake
- As written in the name, the spikes are cut straight, perpendicular to the blade
- Most common on beginner ice skates
- Pros - dig into the ice quickly and deep, firm grip - good for height on jumps
- Cons - deep means less momentum
Cross-cut toe rake
- As written in the name, the spikes are cut at an angle, crisscrossing
- Best for intermediate and advanced to avoid sliding and secure the jumps
- Pros - less deep, only gripping onto the top layer of the ice, which means quicker initial rotation - less sliding, more consistency
- Cons - Less impact on height
K-pick toe rake
This shape has been discontinued.
The design had 3-4 extra picks to provide more control, and according to manufacturers increase jump height and length on some of the jumps (toe loops for example).
Other elements of the toe pick
Then, once that choice of profile is settled, different blades will have different shapes for the:
- Drag pick (or master pick or drop pick) - it is the lowermost spike that is normally spaced a little further. It is used to initiate the verticality of the jump. It is the last section of the blade to leave the ice on a jump, and the first part of the blade to touch it upon landing. And it slightly touches the ice on most spins.
- King pick (or Primary pick) - the topmost spike that is normally large and protruding. It improves contact with the ice when using the toe. Some blades have a very large and aggressive King pick while dance blades have a discreet one.
I recommend reading each blade description and their claim on how it helps your skating.
The Tail length & Lift angle (or heel lift)
The tail length
At the back of the blade, behind the heel plate is the section called the tail.
As a beginner or intermediate, there is no need to worry about the tail.
As you progress, dance skaters and synchronized skaters, will prefer shorter tails to perform quicker steps and avoid mix-ups with other skaters' blades.
The heel lift angle
Because of the rocker, as the drag pick comes into contact with the ice, the tail is lifted. The height it reaches is called the lift angle.
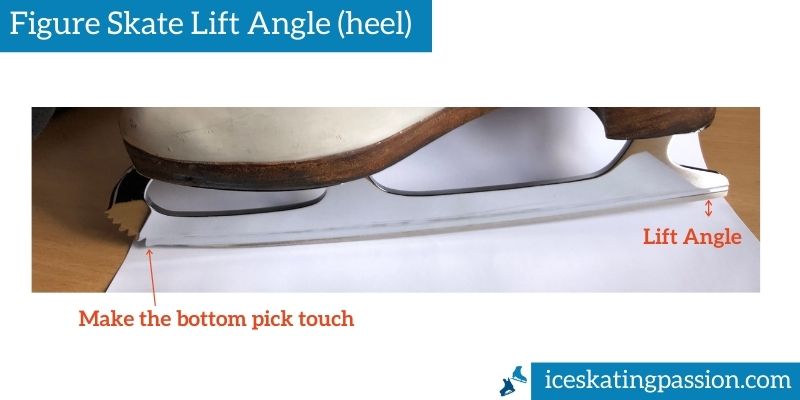
The lift angle (which depends mostly on the rocker) is a good number to define the time it takes for your pick to come into contact with the ice.
The higher the light angle, the higher the toe pick clearance, the longer it takes for your drag pick to contact the ice, the best it is for spins and jumps.
As the blades get sharpened, the angle goes down and the skater cannot rock forward for spins and jumps.
In the next section we will discuss materials.
The blade's material
Now that we have discussed in detail about the shape of the blade, from all angles, let's have a look at the materials being used. The type of metal can have a major impact on that blade’s performance.
A blade's hardness is measured by Rockwell C (HRC). The hardness determines how long your blade stays sharp under normal use.
However, the blade must get softer in the center (away from the edges) to give some flex. Different materials can be used by fusion or by coating.
Typical materials used are listed below with their characteristics, pros and cons.
High Carbon Steel (runner and chassis)
- Steel alloy where carbon has been added to pure steel
- Most common material, especially for beginners and intermediate
- Easy to sharpen
- Often with a Chrome finish
- The hardness should be around 60 HRC
Stainless Steel (runner and chassis)
- Harder material
- Less rust and stains
- More difficult to sharpen - The chromium content in stainless causes the edges to roll and make them less sharp.
Nickel (coat)
- Often used to plate over another metal
- Offers resistance to corrosion
- Often used for beginners
Titanium (coat & chassis)
- Very resistant
- High tensile strength-to-density ratio
- Lighter
Carbon-fiber Composite Materials - for the chassis
- When two or more basic material are fused together
- Lightweight
- Stronger blades
- Preferred at high level
Aluminium for the chassis
- lightweight
Mount, Sharpen and Maintain blades
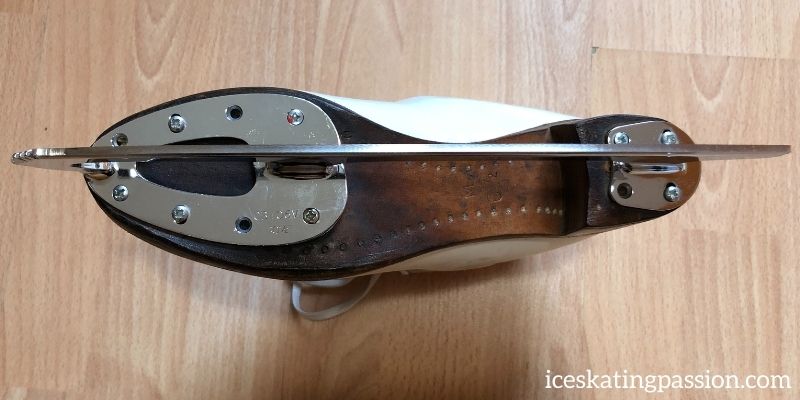
Mounting figure skating blades
For beginner, you don't have to worry. Blades will be mounted on the boot.
However for more advanced skates or if you purchase the blade and the boots separately, you need to mount the 2 together.
Always read the recommendations and instructions.
But, here are a few things you should know:
- You should let a professional mount your blades (either a pro at your local rink or at a skate shop)
- A temporary mount has some screws in place allowing to make minor adjustments. Some will prefer a position slightly closer to the toes. Others with a big arch, will prefer a position slightly more towards the inside of the boot. DO NO jumps on a temporary mount
- The boot heel & sole must be covered with the plates to avoid twisting the blade.
- Possible check on the ice: Glide straight with both feet under your hips, on clean ice with sharpened blades. If, for one of the feet, you see only one line or if one line is thicker than the other, then your weight is not balanced properly (leaning on one edge) and you need to modify how the blade is mounted.
Sharpening blades
Before first use, and regularly when practicing, make sure to have your blades sharpened to help glide on the ice.
The sharpening creates a smooth concave grind that must be centered.
Proper sharpening requires an excellent technique. It must be adapted to the skater's:
- weight
- level
- type of skating
Do not try doing it yourself!
Learn more on my article about sharpening.
Care and Maintenance
Protect your blades
First of all, you need to protect your blades at all times when they are not on the ice.
They are a big investment, and the smallest damage can completely throw off your skating.
- When walking with your skates on off the ice, always wear plastic skate guards. And make sure to clean them regularly. Learn more about skate guards in this article.
- After practice once you have removed your skates and dried out the blade, do not place them without protection in your bag. Make sure to add soakers on so that the blades are protected, and the remaining moisture is absorbed.
Dry out your blades
As mentioned just before, another critical step to take care of your blades is to dry them out after practice.
You don't want any rust forming on them. Which is why you need to be diligent when drying them.
You need an absorbent and soft towel (learn more in my article).
I have found a material that I love. And I added figure skating designs that you can personalize to make them more fun. Check them out:
Extra FAQs
Is there a best figure skate blade?
No, there is not. It all depends on your level, expectations, feet profile...
Why are some figure skating blades so expensive?
To create high level products with strength, flexibility, sharpness, lightness and all, you need a complex manufacturing process with different metals.
You need something that can sustain the repeated landings from jumps.
More expensive metals and more difficult manufacturing means more expensive blades.
However, if you are a beginner, there is no need to put too much money on them. This is for advanced skaters.
How are they made?
3 pieces are made (more for newer profiles) - the runner, the heel plate and the toe plate.
They are soldered together.
The blade is then coated with chrome plating for example. And the chrome is ground off the edges to that the steel is touching the ice.
You might also be interested in:
